Creating your coloring book can be a fun and creative project that allows you to personalize your coloring experience. Whether you want to create a unique gift or enjoy the process of making your coloring book, there are several benefits to this DIY activity. This article will explore why creating your coloring book is a great idea and provide a step-by-step guide.
Starting with the question of why you should create your coloring book, personalization is key. You can choose a theme that resonates with you or your gift recipient by making your coloring book. Plus, it becomes a unique reflection of your artistic style and interests.
To make a coloring book, you will need a few materials. This includes paper for the pages, a printer or drawing tools to create or gather the artwork, coloring tools such as colored pencils or markers, and binding materials to bind the pages together.
The next section of this article will walk you through the step-by-step process of making a coloring book. This includes choosing a theme, creating or gathering artwork, preparing the artwork for printing, printing the pages, adding a cover page, and binding the pages together.
We will provide some tips for creating a great coloring book. These tips include using high-quality artwork to ensure a pleasing coloring experience, varying the complexity of designs to cater to different skill levels, and considering adding background information or interesting facts related to the theme of your coloring book.
By following these steps and incorporating these tips, you can create a unique and personalized coloring book that brings joy and creativity to your life or the lives of others. So, let’s get started on this creative journey of making your coloring book!
Key takeaways:
- Choose a theme: Select a theme for your coloring book that will provide a cohesive and engaging experience for the users.
- Create or gather artwork: Create or gather illustrations that suit your chosen theme and will appeal to your target audience.
- Prepare and print: Ensure your artwork is properly prepared for printing, then print out the pages of your coloring book and add a cover page. Bind the pages together to complete your DIY coloring book.
Why Create Your Coloring Book?
Photo Credits: Loststorystudios.Com by Elijah Thomas
- Designing your coloring book offers a unique and personal experience for both children and adults.
- Self-Expression: Creating your coloring book allows you to express your creativity and individuality.
- Personalized Content: You can choose themes, images, and subjects that resonate with you or your intended audience.
- Customization: Tailor the difficulty level and complexity of the designs to your preference.
- Therapeutic Benefits: Coloring has been shown to reduce stress and anxiety, providing a calming and relaxing activity.
- Interactive Fun: Engage with friends and family by sharing your coloring book or collaborating on designs.
Mary, a stay-at-home mom, created a coloring book for her son with his favorite characters. Not only did it become his go-to activity, but it also sparked his interest in drawing and countless moments of joy and creativity for the entire family.
Materials Needed for Making a Coloring Book
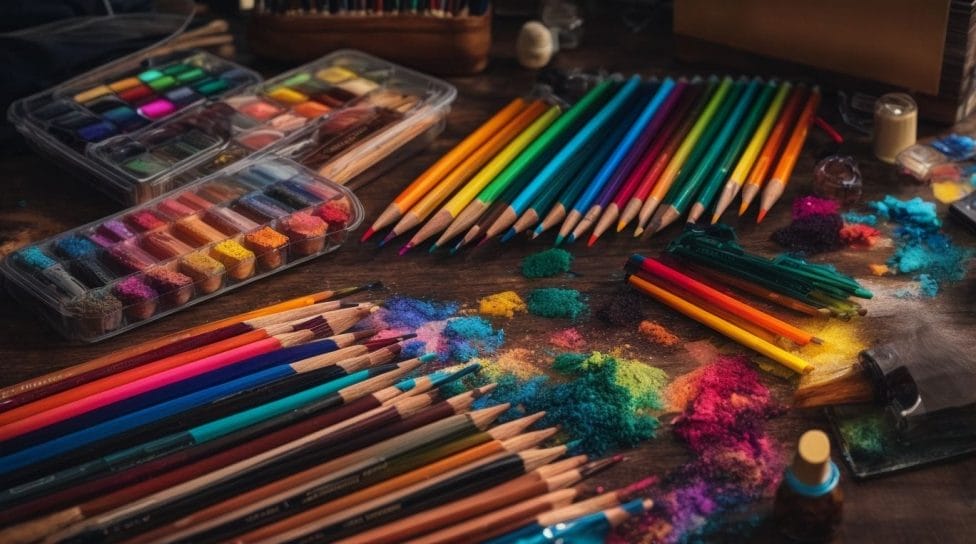
Photo Credits: Loststorystudios.Com by Sean Lewis
Get ready to unleash your creativity with a personalized coloring book! This section will dive into the essential materials to bring your coloring book dreams to life. We’ll explore everything from the type of paper that works best to the tools you can use to print or draw your designs. We’ll discover the wide array of coloring tools available and the various binding materials that will help bring your coloring book together. So grab your imagination, and let’s get started on this colorful adventure!
Paper
When it comes to creating your very own coloring book, the choice of paper plays a significant role in the overall quality of the final product. To ensure a successful outcome, here are some important factors to consider when selecting the ideal paper:
- Weight: The weight of the paper you choose is crucial to avoid bleeding or tearing from coloring tools. Opting for a thicker paper, such as cardstock, is advisable, which offers greater durability.
- Texture: The texture of the paper can greatly enhance the coloring experience. For instance, smooth paper works exceptionally well with colored pencils, while a slightly rougher texture can amplify the effect of markers or crayons.
- Size: When deciding on the size of your coloring book, it is essential to ensure that the selected paper is compatible with your printer or binding method.
- Quality: To protect your coloring book from yellowing or deterioration over time, it is highly recommended to go for high-quality, acid-free paper.
The invention of paper can be traced back to ancient China, specifically during the Han Dynasty around 200 BC; initially crafted from mulberry and other plant fibers, paper-making gradually spread across the globe, revolutionizing communication and fostering creativity. Even today, paper remains indispensable for many purposes, including creating captivating coloring books.
Printer or Drawing Tools
When creating your coloring book, you’ll need to choose the right printer or drawing tools to bring your artwork to life:
- Printer: Perfect for printing high-resolution illustrations with vibrant colors.
- Drawing Tools: Provides sharp and precise lines, ideal for detailed designs.
- Markers: Great for adding bold colors and shading to your drawings.
- Colored Pencils: Allows for more control and blending of colors.
- Crayons: Gives a classic and nostalgic coloring experience.
True story: When Jane decided to create her coloring book, she invested in a high-quality printer and various drawing tools, such as markers and colored pencils. The combination of bold colors and detailed designs made her coloring book a hit among her friends and family.
Coloring Tools: Because adulting is hard, but coloring is easy when you’ve got the right tools!
Coloring Tools
Selecting the right coloring tools is crucial for creating an engaging and satisfying coloring book experience. Here are some indispensable coloring tools to consider:
- Colored pencils: Perfect for precise coloring and adding intricate details.
- Markers: Offer bold and vibrant colors, but be cautious as they may bleed through thin paper.
- Watercolor paints: Enable blending and layering of colors, resulting in stunning effects.
- Gel pens: Provide a smooth and glossy finish, making them the ideal choice for elaborate designs.
- Crayons: A timeless coloring tool, great for quickly filling large areas.
- Blending tools include blending stumps or brushes, which help create seamless transitions and shading.
Coloring tools have a rich history, serving as essential means to produce beautiful illustrations and artwork. Throughout ancient times, civilizations like the Egyptians and Greeks used natural pigments made from minerals and plants to color their artwork. As time went on, coloring tools have undergone significant development with the introduction of new materials and techniques. We have an extensive array of coloring tools, allowing us to unleash our creativity and infuse vibrant colors into our world.
Binding Materials
Binding Materials for a Sturdy and Professional-Looking Coloring Book
Choosing the right binding materials is essential when creating a high-quality coloring book. Here are some options to consider:
| Option 1: Spiral Binding | This popular binding method allows the book to lay flat when opened and makes it easy to flip through the pages. |
| Option 2: Comb Binding | Comb binding uses plastic combs to hold the pages together, allowing for easy adding or removing. |
| Option 3: Perfect Binding | This professional-looking method glues the pages along the spine, creating a sleek and durable finish. |
| Option 4: Stitched Binding | Stitched binding is a more traditional and secure method that involves sewing the pages together and provides a classic look. |
Consider your coloring book’s thickness, budget, and desired aesthetic when choosing the appropriate binding materials. Experimenting with different options is important to find the perfect fit for your DIY creation.
Steps to Make a Coloring Book
Photo Credits: Loststorystudios.Com by Gerald Nelson
Are you looking to create your very own coloring book? We’ve got you covered! In this section, we’ll dive into the step-by-step process of making a coloring book that is sure to delight. From choosing a captivating theme to gathering or creating artwork, preparing it for printing, and finally binding the pages together, we’ll walk you through each stage. So grab your pencils, and get ready to unleash your creativity onto the pages of your coloring book masterpiece!
Step 1: Choose a Theme
Choosing a theme is the first step in creating your coloring book. Consider these steps to help you decide:
- Reflect on your interests: Select a theme that aligns with your hobbies or passions, such as animals, nature, or fantasy.
- Engage your audience: Determine who your coloring book is intended for and choose a theme that will interest and appeal to them.
- Consider versatility: Pick a theme that allows for various designs and images so your coloring book has a wide range of options.
- Get inspired: Browse through other coloring books or art websites for inspiration and ideas to help shape your chosen theme.
- Personal touch: Add a personal touch by incorporating elements or symbols that are meaningful to you.
Once you’ve chosen a theme, you can create and gather artwork to bring your coloring book to life.
Enable your inner artist by creating or gathering stunning artwork for your DIY coloring book!
Step 2: Create or Gather Artwork
To create or gather artwork for your coloring book, follow these steps:
- Step 2: Decide your coloring book’s theme or subject matter.
- Step 2: Create original artwork by drawing or painting illustrations that fit the theme.
- Download or purchase artwork from royalty-free stock image websites that align with your chosen theme.
- Ask friends or family who are artistically inclined to contribute their artwork to your coloring book.
- Scan or digitally enhance physical artwork to prepare it for printing.
- Ensure that the artwork is in black and white and suitable for coloring.
- Consider resizing or rearranging the artwork to fit the pages of your coloring book.
Pro-tip: Mix and match different styles and techniques of artwork to add variety and interest to your coloring book.
Prepare your artwork for the ultimate printing party, where color and creativity come together like a beautiful marriage.
Step 3: Prepare the Artwork for Printing
- Scan or digitize your artwork: Use a scanner or digital camera to capture high-resolution images of your drawings or illustrations.
- Step 3: Prepare the Artwork for Printing. Adjust the image size and resolution: Use image editing software to optimize the size and resolution of the artwork for printing. Ensure it aligns with the desired dimensions of the coloring book.
- Convert to grayscale: If you want black and white coloring book pages, convert the artwork to grayscale mode. This will remove any color information.
- Clean up the images: Use editing tools to remove any unwanted marks, smudges, or imperfections on the artwork. Ensure the lines are crisp and clear.
- Format the images: Arrange the artwork onto pages, ensuring they fit within the printing margins. Consider the layout and flow of the coloring book.
- Save the files: Save the prepared artwork as high-quality JPEG or PDF files suitable for printing. Name them appropriately and organize them in a folder for easy access.
Fact: Did you know that coloring books can act as a therapeutic tool, aiding in stress reduction and relaxation?
Step 4: Print the Pages
To print the pages for your DIY coloring book, here are the step-by-step instructions:
- Prepare your printer: Ensure you have enough ink and paper for printing.
- Select the page orientation: Decide whether you want your pages to be in portrait or landscape format.
- Choose the settings: Adjust the printer settings to match the desired quality and paper size.
- Step 4: Print the Pages Load the paper: Place the paper into the printer’s tray, ensuring it is aligned correctly.
- Print the pages: Send the pages you want to print from your computer to the printer and wait for the printing process to complete.
- Check the prints: Inspect the pages for any smudging or errors once they are printed.
- Repeat if necessary: If you need more pages, repeat the previous steps until all pages are printed.
By following these steps, you’ll successfully print the pages for your DIY coloring book.
Step 5: Add a Cover Page
To incorporate the provided keywords, the rewritten text is:
To add a cover page to your DIY coloring book, follow these steps:
- Select a design or create one that represents the theme of your coloring book.
- Ensure that the dimensions of the cover page match the size of your coloring book pages.
- Add a title to the cover page, using fonts and colors that are appealing and easy to read.
- Consider including an image or illustration on the cover that captures the essence of your coloring book.
- Step 5: Add a Cover Page – Personalize the cover by adding your name or a message if desired.
- Print the cover page on sturdy paper or cardstock to make it more durable.
- Once printed, fold the cover page in half to fit the rest of the pages of your coloring book.
- Attach the cover page to the rest of the pages using binding materials such as staples, glue, or a binding machine.
Adding a cover page will protect your coloring book and make it more visually appealing. Let your creativity shine, and have fun designing a cover that will entice others to explore your coloring book masterpiece.
Secure those colorful pages like a boss by binding them together – the final step to turning chaos into a masterpiece!
Step 6: Bind the Pages
- Gather the printed pages and arrange them in the desired order.
- Trim any excess paper around the edges for a clean finish.
- Decide on the type of binding you prefer, such as spiral binding, saddle stitch, or stapling.
- Take the pages to a professional print shop or use a binding machine to secure the pages together.
- If using a binding machine, carefully align the pages and follow the machine’s instructions for binding.
- Bind the pages together according to the instructions provided by the binding machine, ensuring they are securely bound.
- Once the pages are securely bound, double-check that all pages are in the correct order.
For a professional touch, you can also consider adding a cover page laminated for durability.
Creating a DIY coloring book is a fun and rewarding project. Remember to be creative with your designs and enjoy the process of bringing your artwork to life!
Make your coloring book a work of art by using high-quality designs, varying complexity, and adding background information – the result will be a masterpiece that’s more than just a coloring book.
Tips for Creating a Great Coloring Book
Photo Credits: Loststorystudios.Com by Anthony Mitchell
Designing a captivating coloring book requires careful consideration and attention to detail. This section will uncover key tips that will elevate your coloring book game. From using high-quality artwork to varying the complexity of designs and even considering the inclusion of background information, we’ll explore various techniques to ensure your coloring book stands out. Get ready to unleash your creativity and impress colorists of all ages!
Use High-Quality Artwork
High-quality artwork is fundamental to creating a coloring book to ensure a positive user experience. Here are some compelling reasons why:
- Utilizing high-quality artwork enhances the overall aesthetic appeal of the coloring book.
- It provides a clear and detailed outline for coloring.
- Moreover, it allows for better color blending and shading effects.
- Furthermore, it increases the longevity of the coloring book, as lower-quality artwork may fade or smudge over time.
- Ultimately, it offers users a more enjoyable and satisfying coloring experience.
Always remember that using high-quality artwork showcases your creativity and dedication to producing a top-notch coloring book.
Even Picasso couldn’t handle coloring outside the lines, so keep things interesting by varying the complexity of your designs.
Vary the Complexity of Designs
Varying the complexity of designs is crucial when creating a coloring book as it caters to different skill levels and preferences. Here are some ways to achieve this:
- Incorporate varying levels of complexity by including simple designs with larger spaces for beginners or younger audiences.
- For experienced colorists who enjoy a challenge, add intricate and detailed designs.
- Create a mix of designs with different levels of complexity to offer options for different coloring moods.
- Appeal to diverse interests by offering a range of subjects and styles, such as animals, mandalas, or abstract patterns.
By varying the complexity of designs, you ensure that your coloring book is engaging and accessible to a wide audience. Fun Fact: Studies have shown that coloring intricate designs can have therapeutic benefits by promoting relaxation and mindfulness.
Consider Adding Background Information
Adding background information to a coloring book can enrich the overall experience and educational value. It provides context to the illustrations and can educate users about the subject matter. Some tips for adding background information include providing facts, trivia, or descriptions related to the images. For example, in a nature-themed coloring book, you can include details about the different animals or plants portrayed. This can engage users and encourage them to learn more about the topic. Adding background information is a simple yet effective way to make your coloring book more informative and enjoyable for users.
Some Facts About How To Make Coloring Book:
- ✅ Coloring books are enjoyed by people from all walks of life, including public figures like Kate Middleton, as a stress reliever and creative outlet. (Source: Our Team)
- ✅ PicMonkey offers a simple 5-step process for creating a coloring book. (Source: Our Team)
- ✅ The first step in creating a coloring book using PicMonkey is to open an 8.5″ x 11″ blank canvas and enable crop and bleed marks for printing. (Source: Our Team)
- ✅ Users can customize their coloring book canvas in PicMonkey by adding graphics and text, resizing and rotating them as desired. (Source: Our Team)
- ✅ The design created in PicMonkey can be downloaded as a PDF with crop marks for perfect edges, making it easy to print. (Source: Our Team)